The Point to Point Tunneling Protocol (PPTP) is a network protocol used to create VPN tunnels between public networks. PPTP servers are also known as Virtual Private Dialup Network (VPDN) servers. PPTP is preferred over other VPN protocols because it
Configure PPTP Server
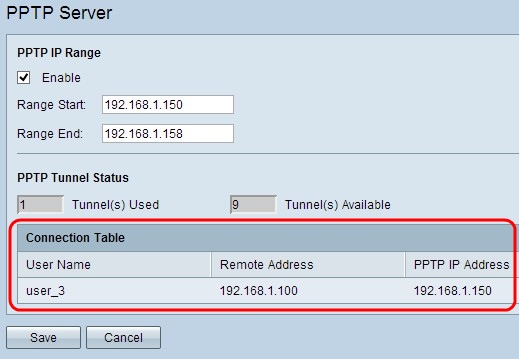
PPTP IP Range
Step 1. Log in to the web configuration utility and choose VPN > PPTP Server. The PPTP Server page opens:
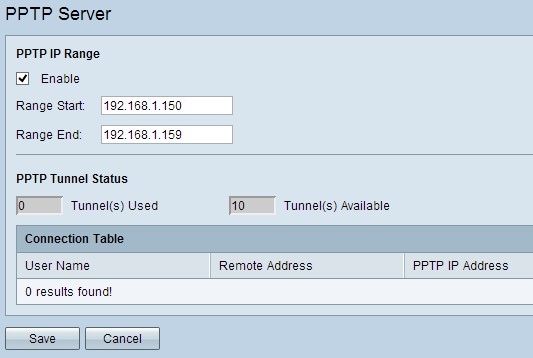
Step 2. Check the Enable check box to enable the PPTP Server on the RV320.
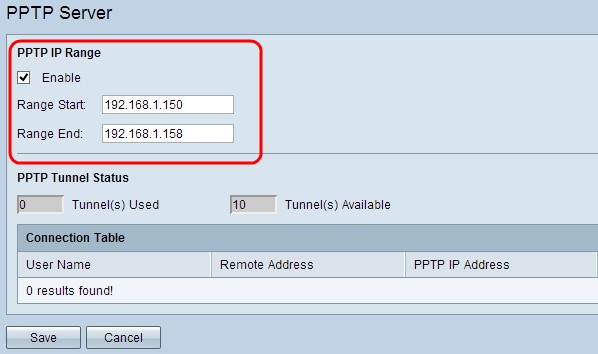
Step 3. Enter the starting LAN IP address of the range assigned to the first PPTP VPN client in the Range Start field. The default IP is 192.168.1.200.
Step 4. Enter the last LAN IP address of the range assigned to the last PPTP VPN client in the Range End field. The default is 192.168.1.204.
Step 5. Click Save to save the settings.
PPTP Tunnel Status
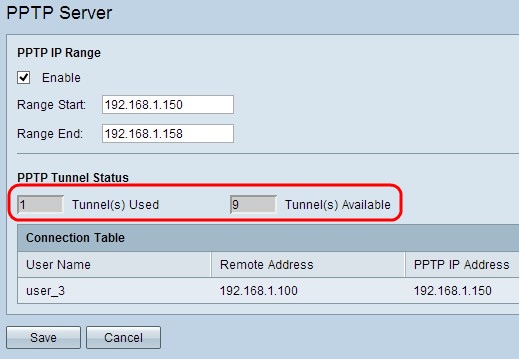
• Tunnel(s) Used — Represents the number of tunnels that are currently in use by the PPTP Server.
• Tunnel(s) Available — Represents the number of tunnels that are still available to configure the PPTP Server.
Note: You need to add users before you can setup a connection in the connection table. For more information on how to configure users, refer to to the article User and Domain Management Configuration on RV320 and RV325 VPN Router Series.

• Connection Table — The Connection List is a read-only list that shows information of VPN clients. The list shows the Username of the PPTP VPN client, Remote WAN IP address of the PPTP VPN client and the PPTP IP Address that the PPTP server assigns to the client upon connection. You need to configure PPTP VPN connection on Windows to display the user in the Connection Table.
Note: To learn more on how to setup the PPTP connection, refer to the Configure PPTP VPN Connection on Windows section.
Configure PPTP VPN Connection on Windows
Step 1. Log into the computer and choose Start > Control Panel > Network and Internet > Network and Sharing Center. The Network and Sharing Center window appears.


Step 2. Click Set up a new connection or network to create a new connection or network. The Set Up a Connection or Network window appears.

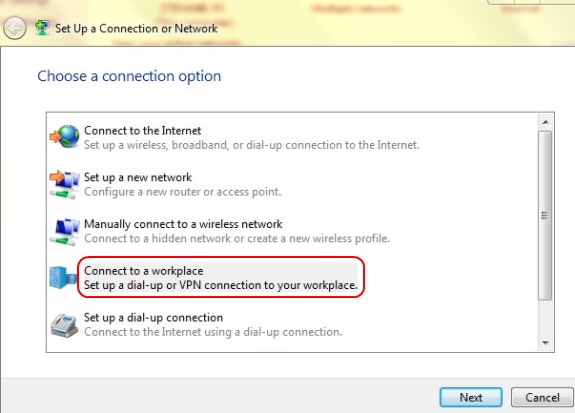
Step 3. Click Connect to a workplace to connect from the work place.
Step 4. Click Next to continue. The Connect to a Workplace window appears:
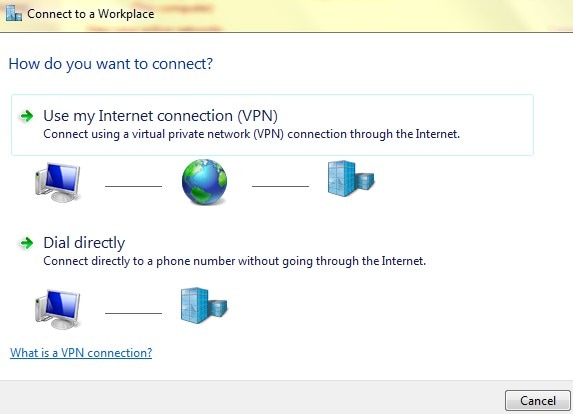
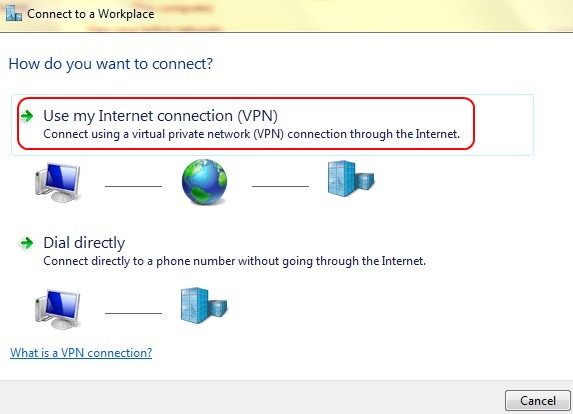
Step 5. Click Use my Internet connection (VPN) to use your Internet connection.

Step 6. Click I'll set up an Internet connection later to configure the Internet connection later.
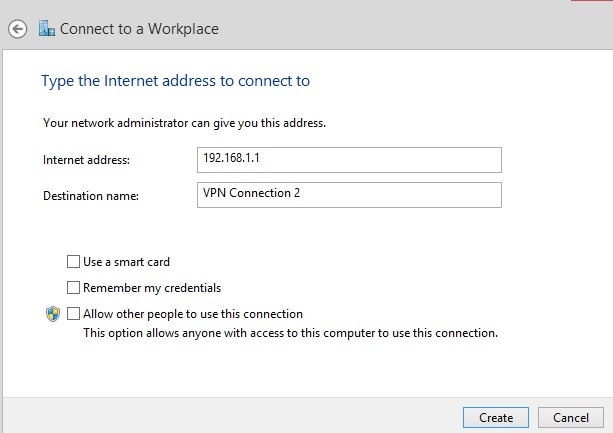
Step 7. Enter the IP address of the LAN IP address of the RV320 into the Internet address field.
Step 8. Enter a name for the destination in the Destination name field.
Step 9. Click Create.
Note: If you are on Windows 8, the next procedure applies. If you are on Windows 7, the next three images are different, but the procedure is the same.

Step 10. Click the Network icon on the task bar. This displays all the networks, wireless, VPN, and Dial-up, available to be connected to the computer:
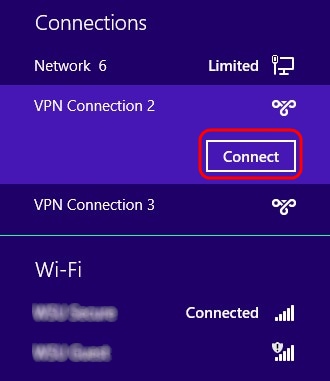
Step 11. Click Connect to connect the specific connection.
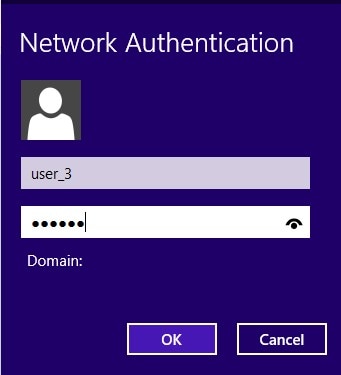
Note: You have to configure the user in the User Management page. To know more on how to configure user management, refer to the article User and Domain Management Configuration on RV320 Router. For the Step 12 and Step 13, you have to provide same user name and password you provided in the User Management page.
Step 12. Enter the user name in the Username field.
Step 13. Enter the password in the Password field.
Step 14. Click OK.
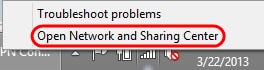
Step 15. Right click on the network icon on the task bar and click Open Network and Sharing Center.
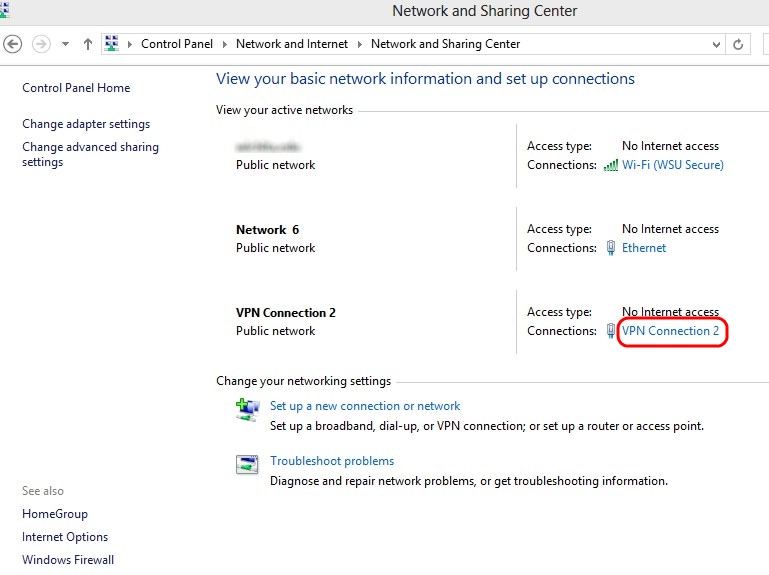
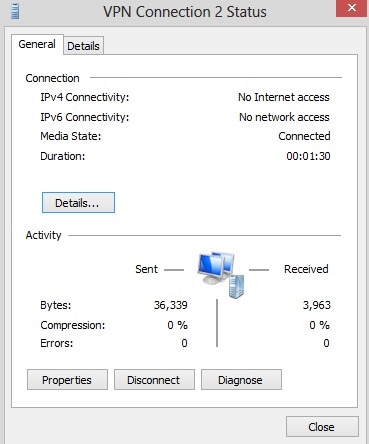
Step 16. Click on the specific VPN connection. The Status window appears:
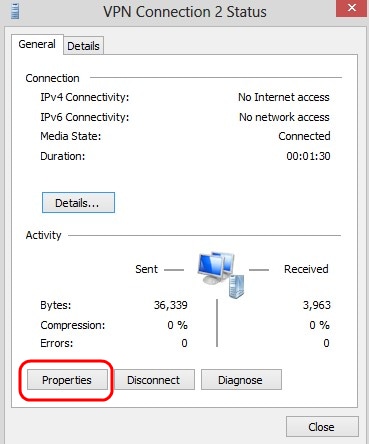
Step 17. Click Properties. The VPN Destination Properties window appears:
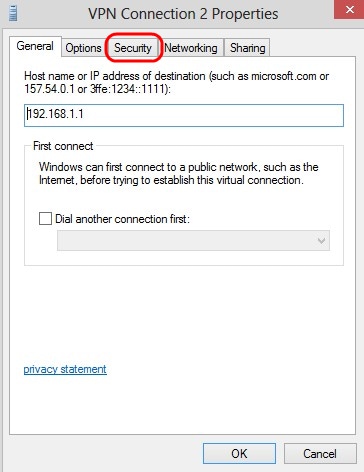
Step 18. Choose the Security tab at the top of the window.
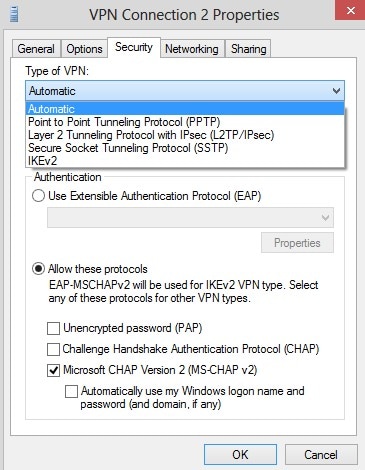
Step 19. Choose Point to Point Tunneling Protocol (PPTP) from the Type of VPN drop-down list.
Step 20. Click OK to save the settings. The new connection adds in the Connection Lists of the PPTP Server page.