Using an RV320 Firewall at a customer location and using the Cisco Easy VPN and PPTP to connect Windows 10 Pro client VPN.
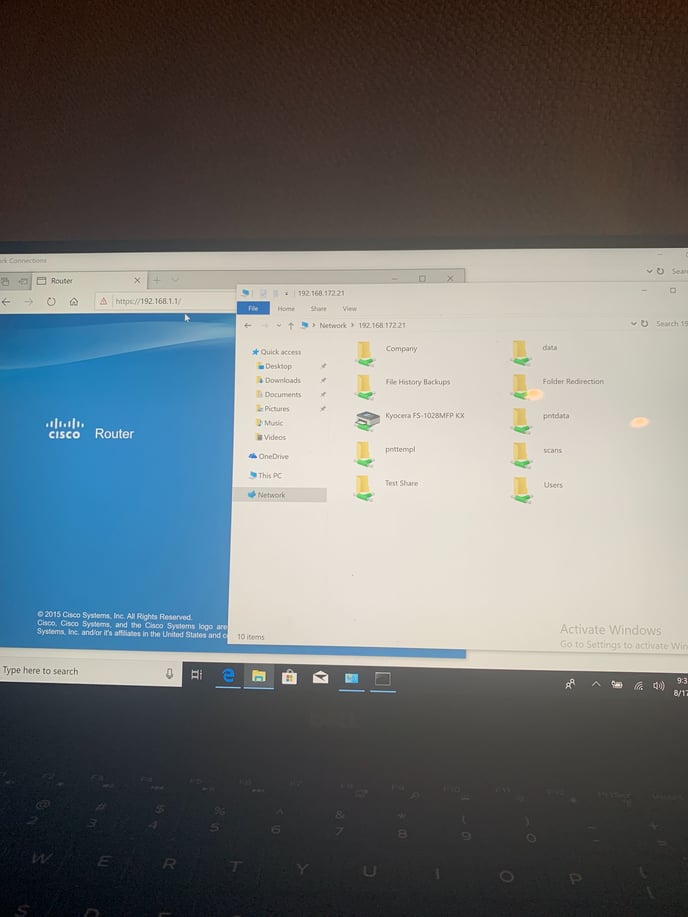
The Router
1) Log into the router's web interface. Go to > VPN > Client to Gateway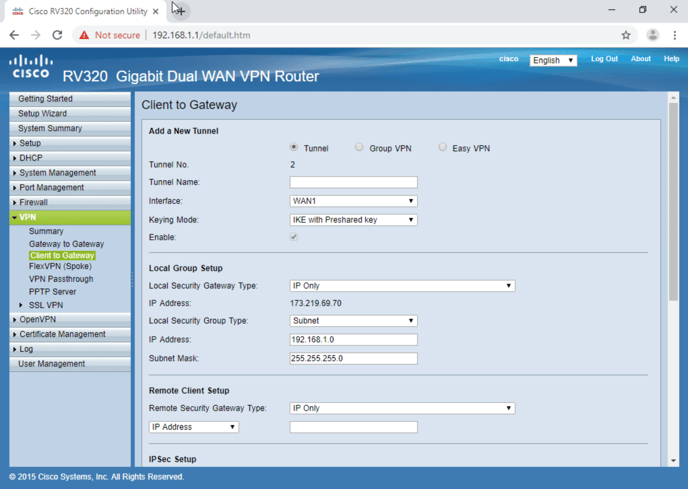
Step 2. Click the Easy VPN radio button.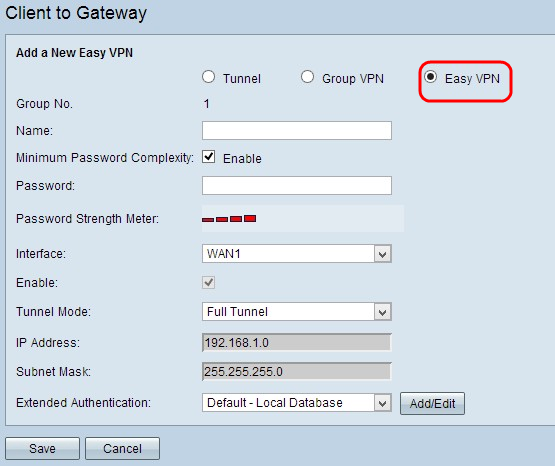
Note: The Group No. represents the number of the group. It is an auto generated field.
Step 3. In the Name field, enter the name of the tunnel.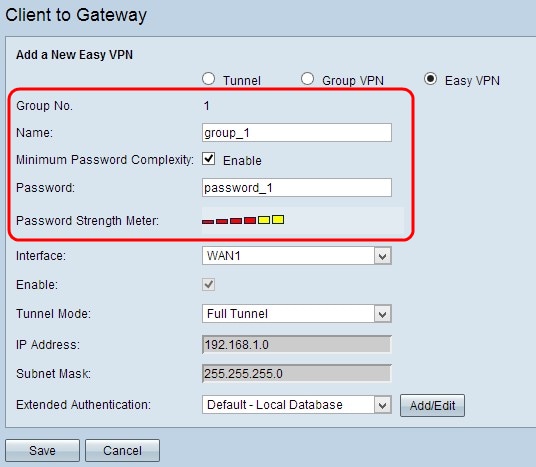
Step 4. (Optional) If you want to enable the strength meter for the preshared key, check the Minimum Password Complexity check box.
Step 5. In the Password field, enter a password.
• Password Strength Meter — Shows the strength of the password through colored bars. Red indicates weak strength, yellow indicates acceptable strength and green indicates strong strength. If you did not check the Minimum Password Complexity check box in Step 4, then the Password Strength Meter does not appear.
Step 6. Choose the appropriate interface through which the client establishes Easy VPN to the gateway from the Interface drop-down list.

Step 7. Check the Enable check box to enable client to gateway VPN. By default it is enabled.
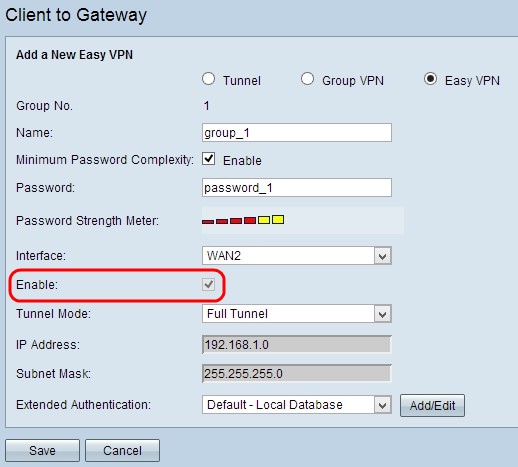
Step 8. Choose the appropriate tunneling mode from the Tunnel Mode drop-down list.
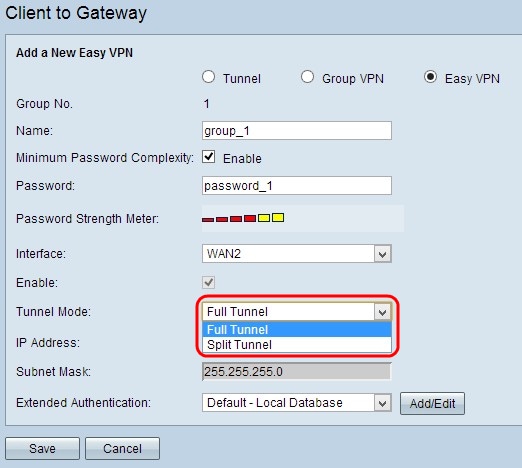
The available options are defined as follows:
• Full Tunnel — Sends all traffic over the VPN tunnel, which provides more security to the traffic. If you choose this option, skip to Step 11.
• Split Tunnel — Allows the VPN client to access the public Internet as well as the VPN resources at the same time, which conserves bandwidth.
Step 9. In the IP Address field, enter the IP address you want to assign to the interface of the Easy VPN.
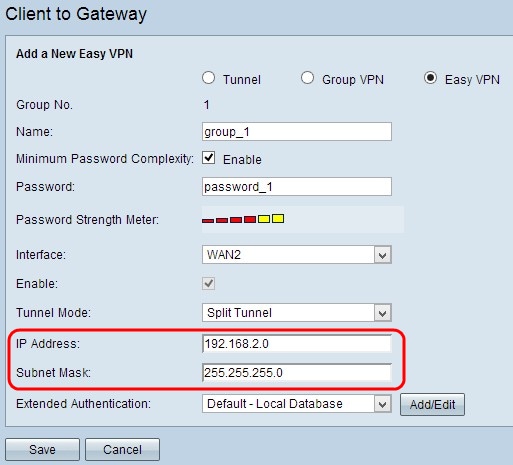
Step 10. In the Subnet Mask field, enter the subnet mask of the assigned IP address of the Easy VPN interface.
Step 11. Choose the appropriate authentication for the VPN client from the Extended Authentication drop-down list to use an IPSec host username and password to authenticate VPN clients, or to use the database found in User Management. This must be enabled on both devices for it to work.

The available options are defined as follows:
• 1 - Active Directory — Authentication is extended through active directory. Active directory is a service that provides network security on a Windows domain network. Click Add/Edit if you want to add a new directory or edit the existing directory.
• Default - Local Database — Authentication is performed by the router. Click Add/Edit if you want to add or edit the database.
**Note**
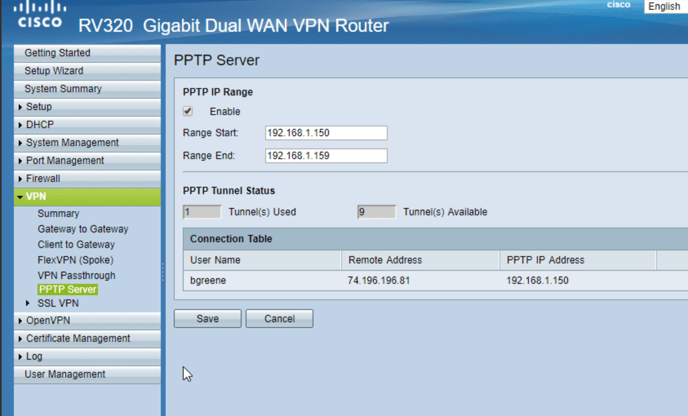
Make sure PPTP is Enabled on the firewall
Windows Client
First, you will open the Control Panel and go to Network and Sharing Center.
To do this, right-click on the Start Menu you will see a screen like this. Select Control Panel.

Next, to get to Network and Sharing Center select Network and Internet.

From there, select Network and Sharing Center.

Now we will create a new VPN connection.
Select Set up a new connection or network.

Select Connect to a Workplace and click Next.

Now, select Use my Internet Connection (VPN).

Next, we will input the Internet address and Destination name.
For the Internet address type vpn.ufl.edu and for the Destination name type UF VPN and select Create.

Next, we will change the security settings to allow for a proper connection.
You should still be in the Control Panel under Network and Sharing Center. If you have closed this window, navigate back to Control Panel > Network and Internet > Network and Sharing Center.
On the left hand side of the page you will select Change Adapter Settings.

A screen will come up with different types of connections such as Ethernet or Wireless.
The one you want to edit is the new VPN connection. Right click on VPN and select properties.

On this window, there are a few things that need to be changed. Click on the security tab at the top to get a window similar to this.

In the dropdown box at the top, you want to select Layer 2 Tunneling Protocol with IPsec (L2TP/IPsec).
Also, on the bottom select Allow these protocols. The only one that should be checked is Microsoft CHAP Version 2 (MS-CHAP v2).
DO NOT close the window yet.
Next select Advanced Settings.
Select Use preshared key for authentication.
For the key: type the password used when setting up the VPN.

From here select OK until the window closes.
Now, on the bottom right-hand side of the screen select the monitor or radio wave icon. This will bring up a window that should similar to this.

![]()
Select UF VPN.
On this window select Connect.

For Username and Password, this information will be in the local database on the firewall.